

How To Set Timer On Iphone Camera 13
How to prepare the iPhone photographic camera timer
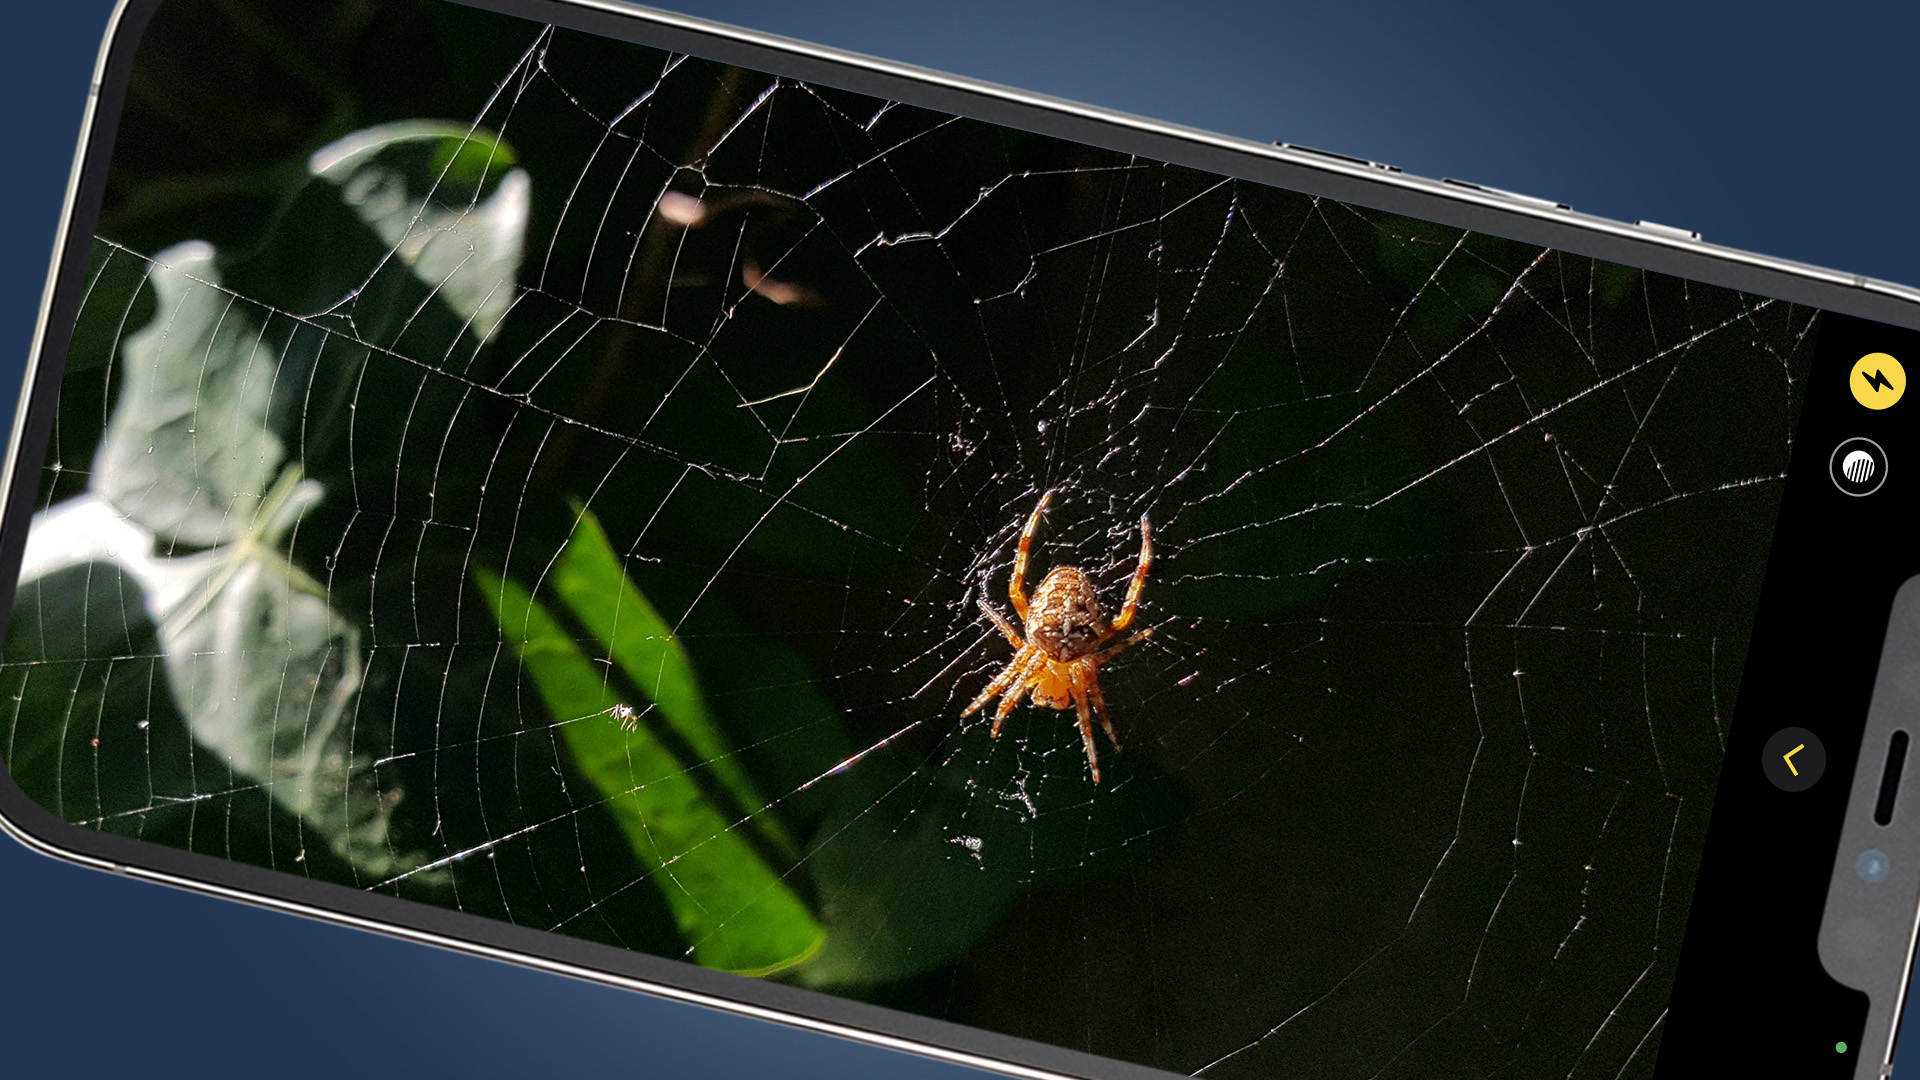
Learn to how to set (and master) the iPhone camera timer
(Image: © Future)
Trying to piece of work out how to set the iPhone camera timer for easily-free photography? It isn't immediately obvious where to find this useful tool, but our guide is here to help.
The brusque answer is in the box to the right. You can either swipe up to find the Camera app's additional tools, or use the arrow at the summit of the screen to reveal them.
Quick steps: how to set the iPhone camera timer
one. Open the camera app and select 'Photo' mode.
2. Film up from the photograph mode menu above the shutter.
3. Choose the 'clock' icon and pick a timer length.
Merely knowing where to find the iPhone camera timer and understanding how to use it are 2 different things. The timer isn't simply useful for family unit photos where the iPhone owner also wants to be in the pic. It can also exist used for shooting long exposure photography, macro images and selfies in the highest possible quality.
We're going to testify you how to get the nearly out of the iPhone'southward camera timer characteristic. And we'll besides tell you lot nearly the few times you might want to consider using the timer in a third-party app rather than Apple tree's own.
These are, thankfully, thin on the footing considering Apple's camera app is more intuitive and responsive than virtually any other iPhone camera app out there. Offset, let'southward look at the basics – starting with where to find the timer in the Photographic camera app.
How to prepare the iPhone photographic camera timer
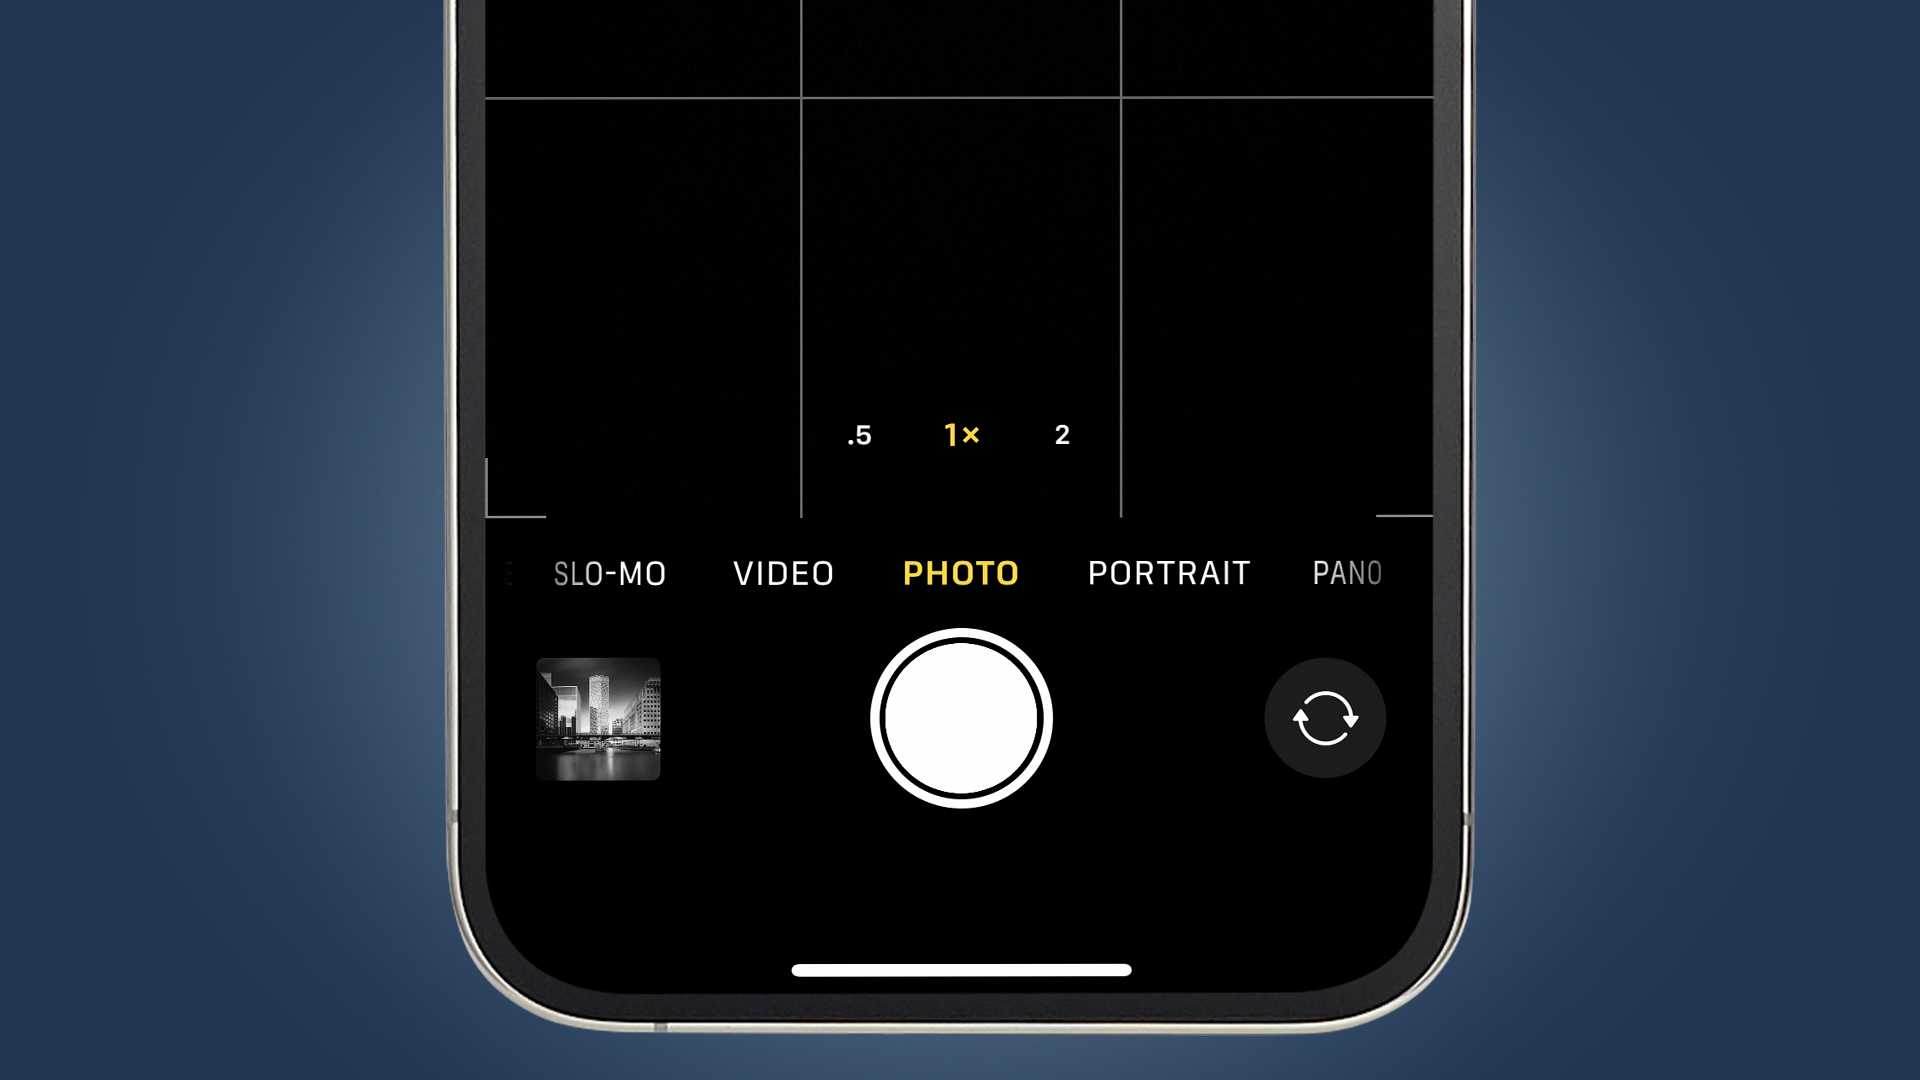
- Open upward the photographic camera app and select Photo. The first step is to open the camera app on your iPhone and select the Photograph mode. Your iPhone volition well-nigh likely open the app in this way. Just if you lot're in another one, just employ left-right swipes until you see 'Photo' at the centre of the bottom of the screen.
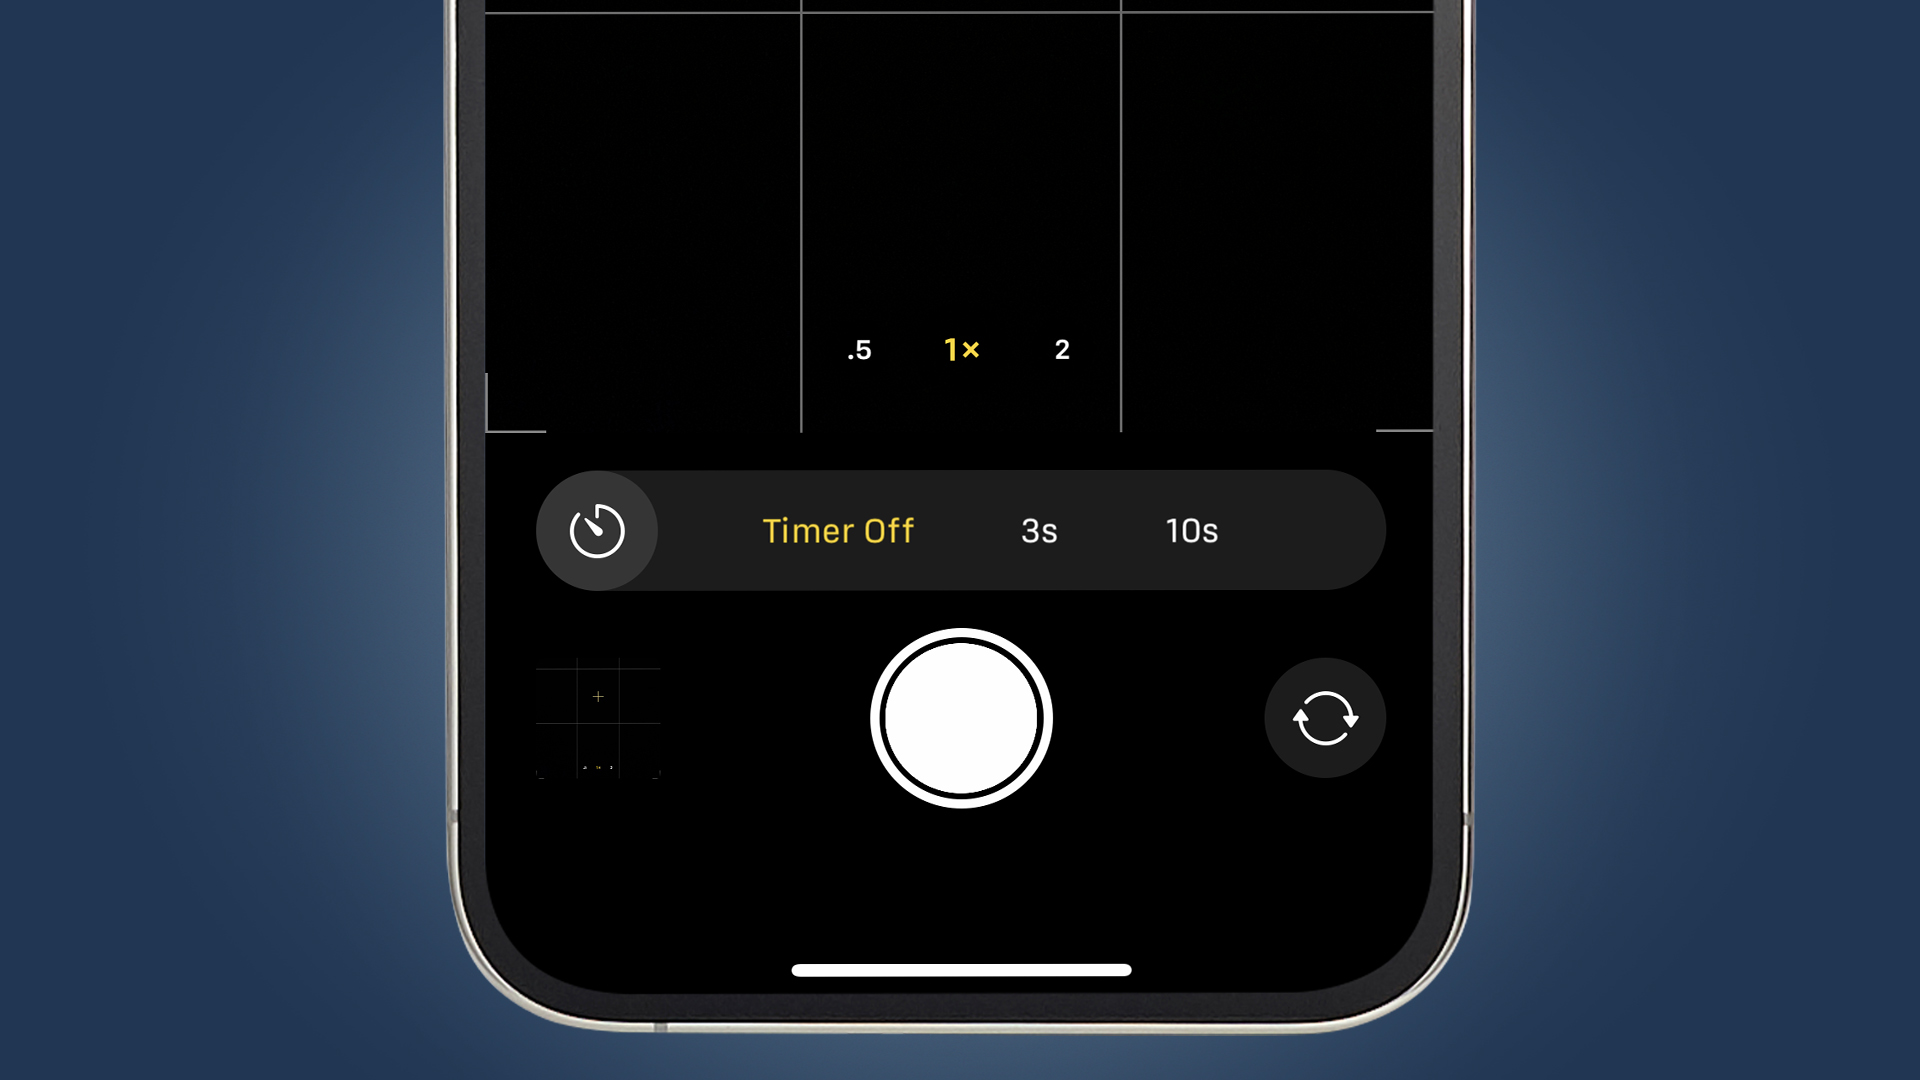
- Flick upwards to access the settings shortcuts. Swipe upwards at the base of the camera preview image and you volition see a little toolbar of icons (beneath). These are shortcuts to a few more avant-garde customization features that nigh people don't need to worry about. But information technology's where we find the photo timer control.

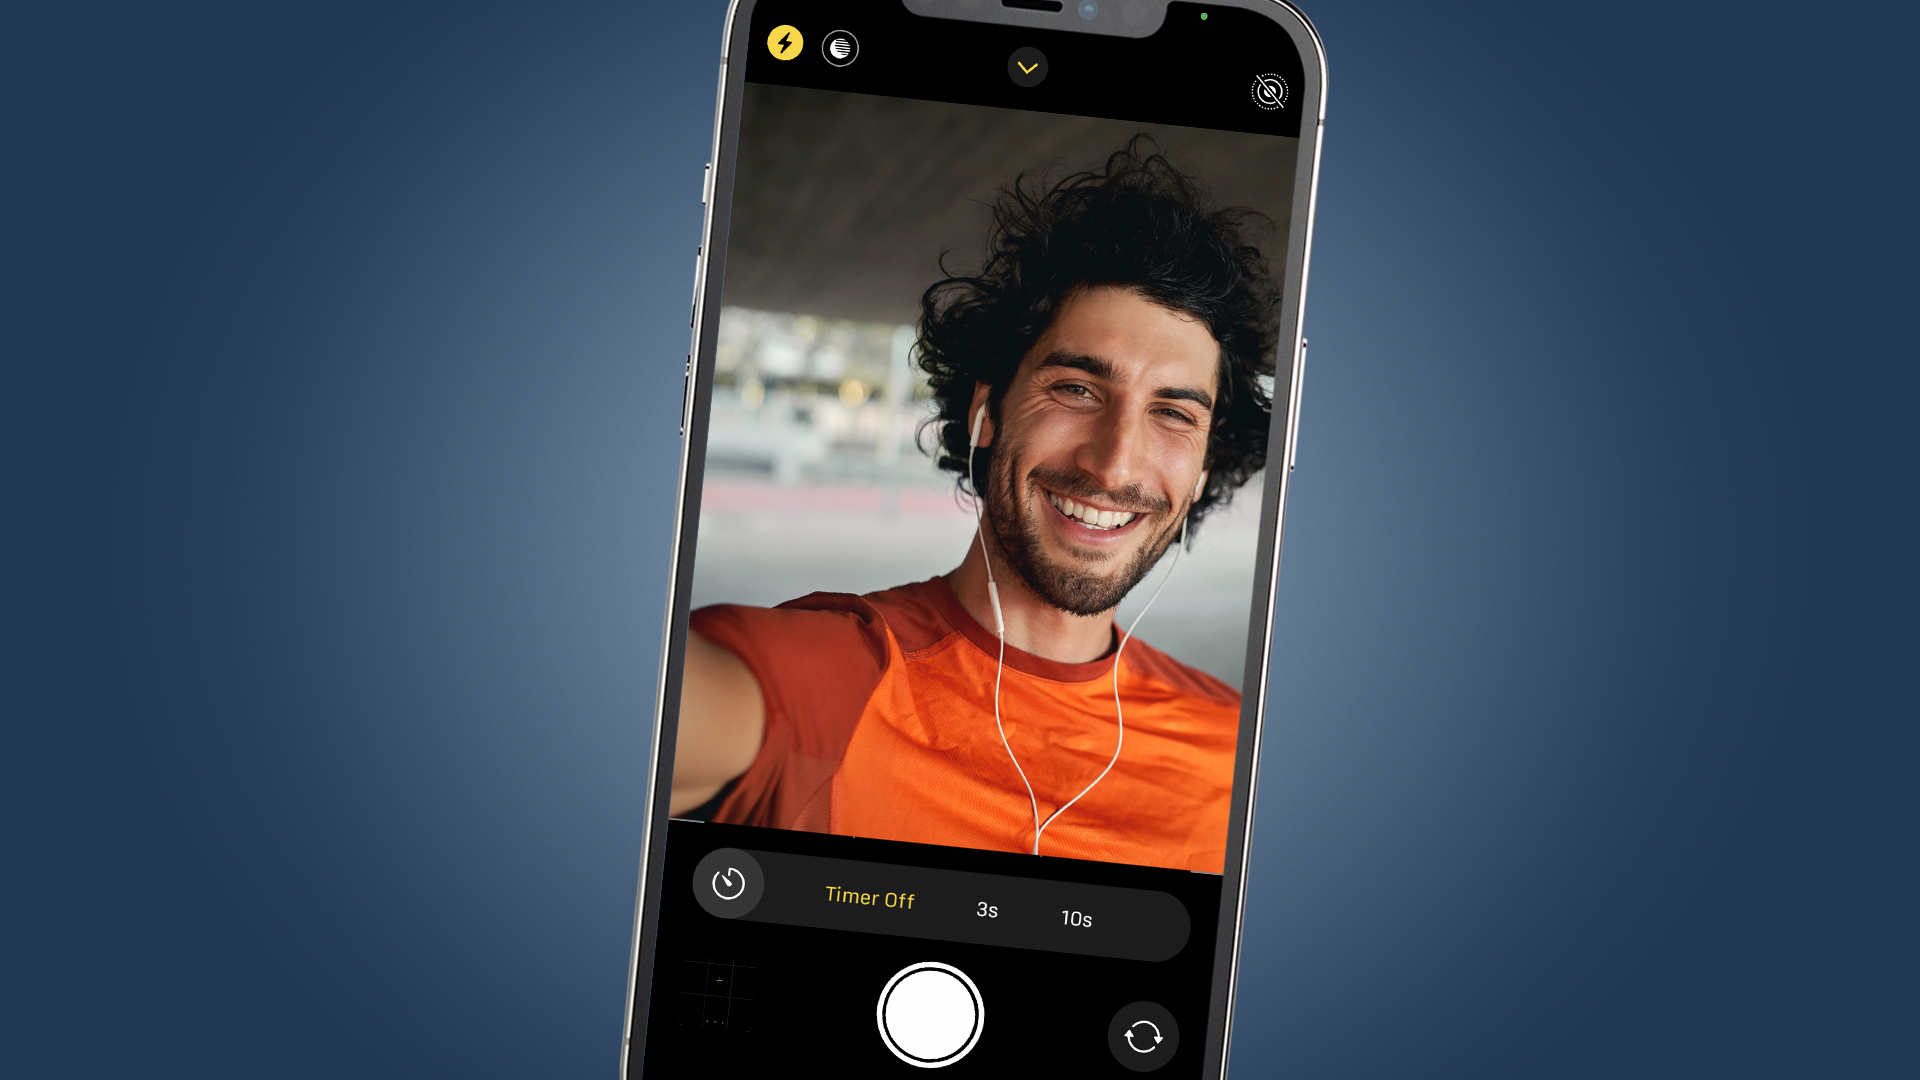
- Select your timer window. In one case you lot've pressed the timer shortcut you should see a pop-up, where "timer off" is currently selected. Alongside this are "3s" and "10s" options. This lets y'all choose how long the pause it before your iPhone takes a photo.
- How to take timer photos. Once the timer is switched on, just take a photograph every bit your normally would. Press the shutter button and y'all'll see an on-screen inaugural, equally well as a flash pulse to permit any folks being photographed (and y'all) know that the iPhone is doing its matter. If your iPhone's sound is turned on, you'll also hear a rapid barrage of shutter fire sound effects at the end, because standard iPhone timer shots don't capture a single image, simply a flare-up of 10 images.
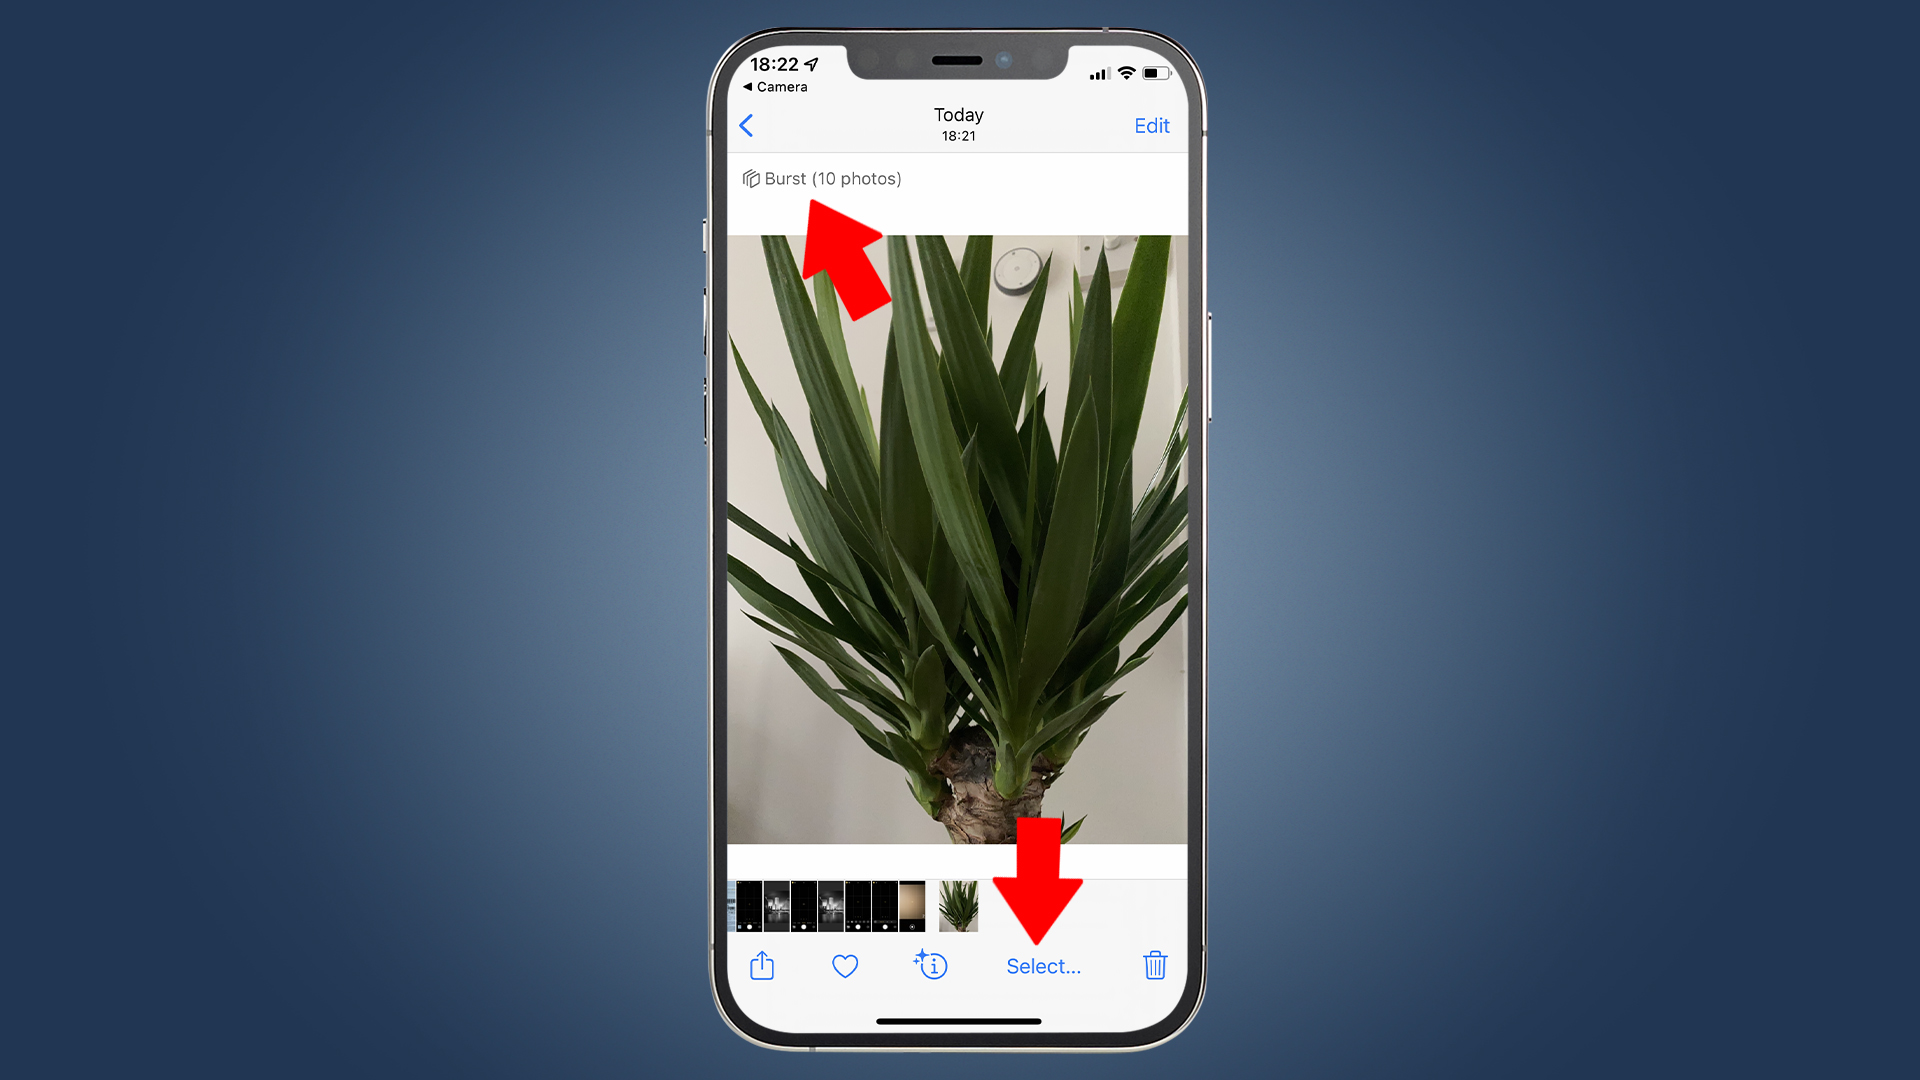
- Pick your best shots. Apple's burst arroyo means you have a whole stack of images to choose from. Desire a wait? Head into the gallery past tapping the picture preview at the bottom-left of the screen. Scroll to get to the shot you want to have a closer look at. Towards the top of the screen yous should come across a "flare-up (x photos)" characterization. And a 'Select' option at the bottom of the screen (see in a higher place). Give this a tap.
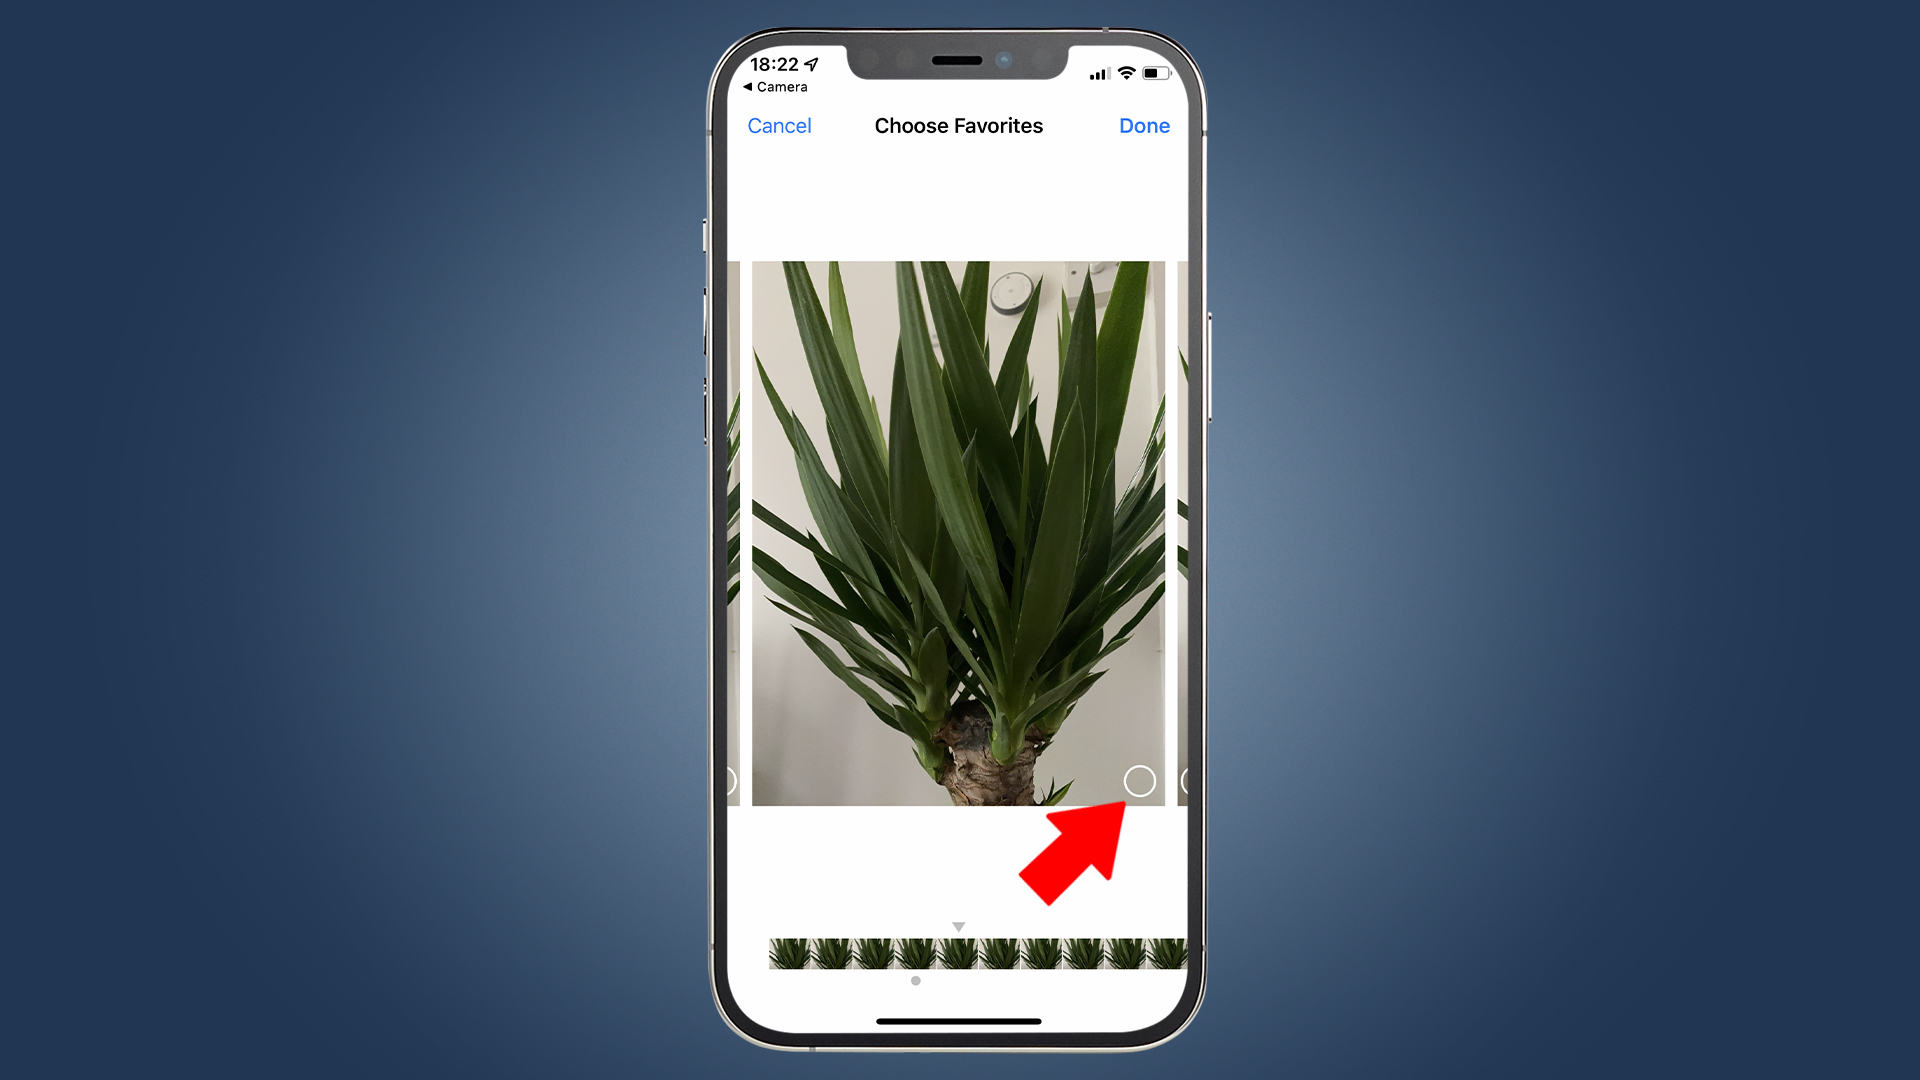
- Cull the keepers. You will now see all ten shots captured, bundled in a row. There will be a little circle in the corner of each, a tick box (above). You tap these to select the images yous want to continue. Then tap 'Done' in the top-correct – the app volition confirm whether you desire to keep the lot or throw the unselected ones in the trash.
When to utilise the iPhone camera timer
We at present know how to go your iPhone using its timer mode. But when should y'all use information technology? Here are some situations that do good from timed shots.
i. The classic: group portraits
Who doesn't have awkward childhood memories of this one: being forced into a line with family unit members, or perchance friends during a 9th birthday party. The camera is propped up confronting a tree stump and you're all passive-aggressively commanded to smile every bit the lensman parent/adult runs back from the camera to go in the shot.
Except at present you are the developed, telling everyone to grinning. The iPhone's timer manner is perfect for the task. However, we strongly recommend using a tripod if possible, rather than whatsoever unassuming piece of nature looks strong enough to hold your phone's weight.
A tripod, obviously, gives you much greater command over the composition of the scene, so you don't need to crop the epitome after to get a correct-looking photo. There are no additional instructions hither bar that you might want to utilize the 10s delay way to give everyone time to paste on their signature smiles.
2. Taking better selfies
Have you spent ages trying to become a selfie with the rear camera by bullheaded-pressing the shutter button from the other side of the telephone? We certainly have.
The whole procedure becomes a hundred times easier if you use the timed mode instead. Set the timer to three seconds then just whip the phone around and look at the primary sensor – unless you actually want an image where you are looking off into the distance.
For the virtually flattering results, concur the phone a footling in a higher place caput height. This avoids unnecessary double-chinning.
Yous should as well endeavor the Portrait mode if your iPhone is new enough to support it. This blurs out the background, a fantastic effect for selfies. And this mode'due south timer works just like the one of the standard Photo fashion. Only swipe up, tap the timer icon and select "3s".
For group selfies, just switch to the rear broad camera by pressing the on-screen "1x" field of view button before tapping the shutter, so that information technology reads "0.5x".
iii. Transmission 'tedious shutter' photography
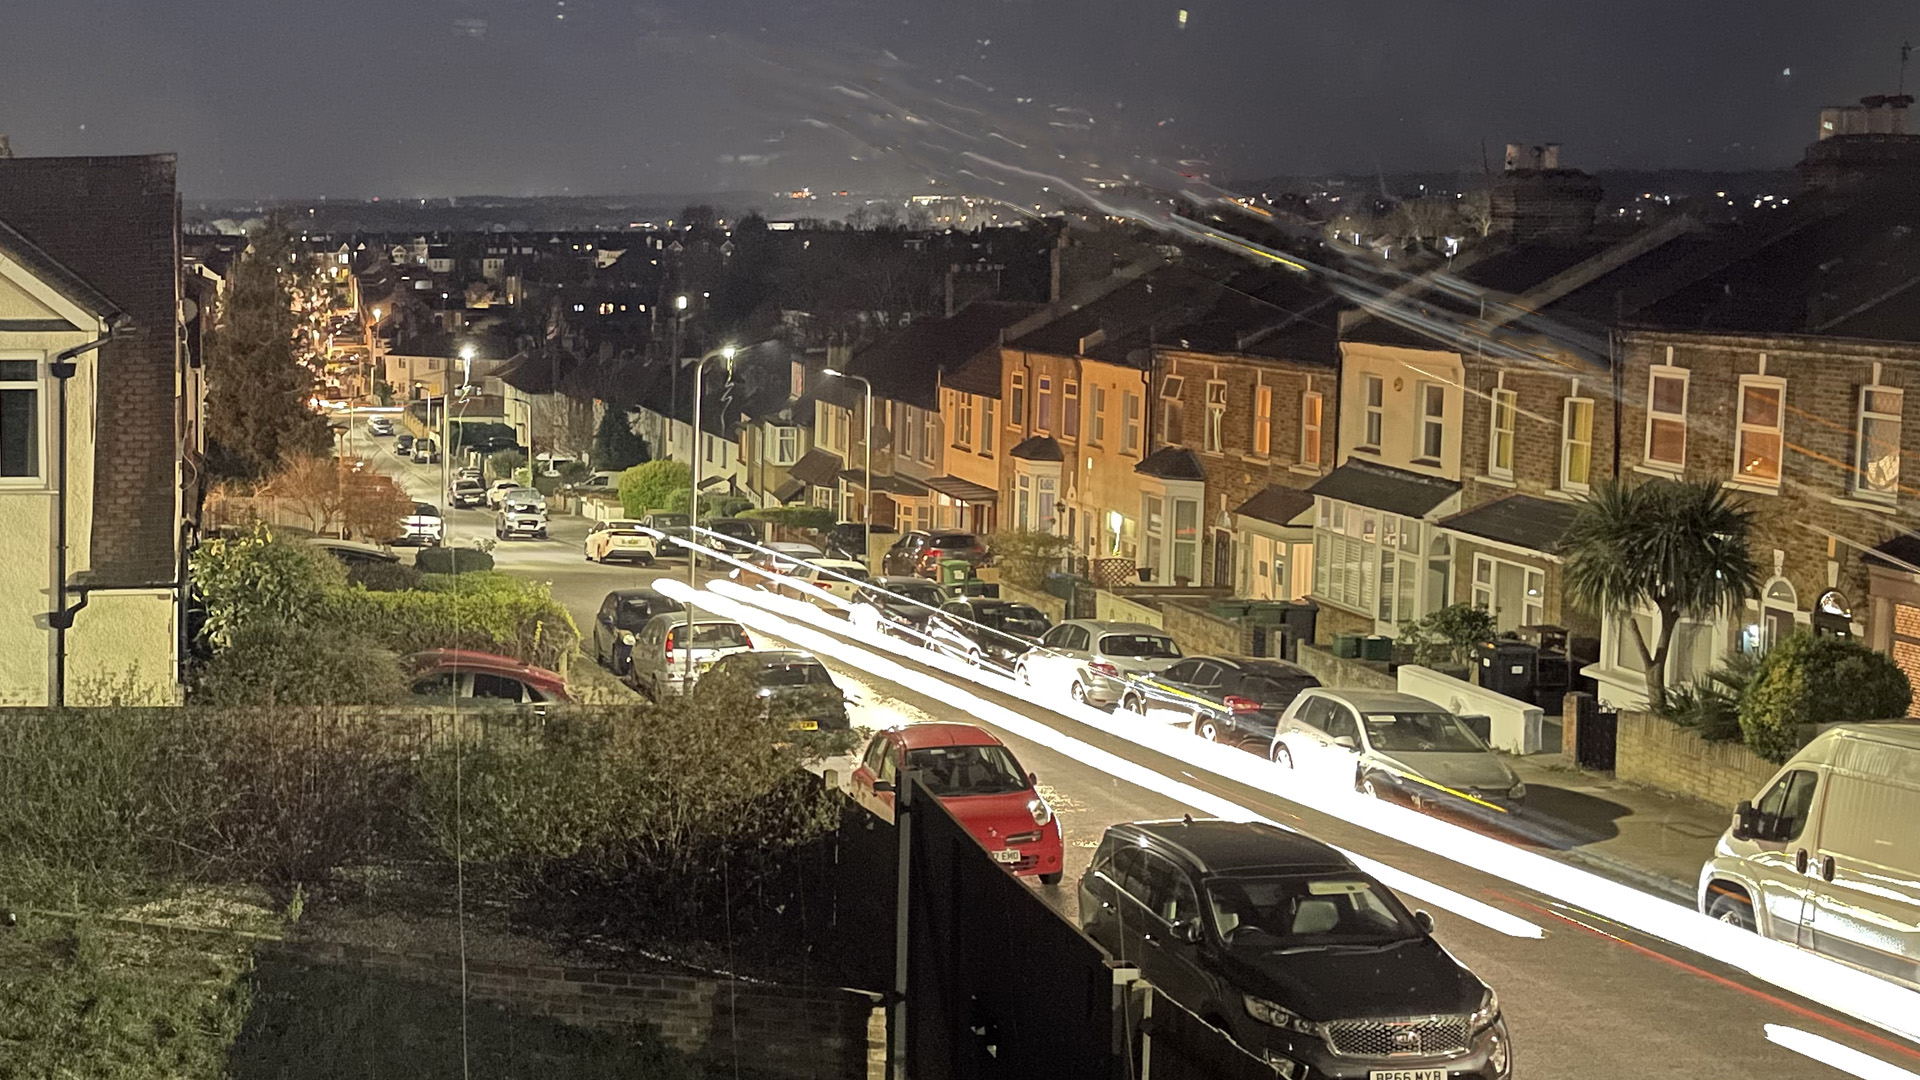
iPhones don't let yous accept true classic low-lite images. This is where the shutter is opened for a fix, fairly long period of fourth dimension, allowing for loads of calorie-free to hit the sensor when there'south barely whatsoever to see.
The iPhone camera app offers not shutter speed control. Fifty-fifty with the help of a third-party app, you can only manually engage the shutter for a maximum of 1 2d. However, you can go sure slow shutter speed effects like light trails and smooth-looking water in movement, and these volition often benefit from a timed shot.
These can exist performed both with the iPhone'southward own camera app and a third-political party ones. Here's how it works in the broiled-in Camera app.
- Make sure the Live photos mode is switch on. Its icon is a set of concentric circles, and it lives in the top-right of the screen when the iPhone is held in portrait.
- Set a 3s delay by swiping up on the camera preview image to make the settings toggles appear. Tap the timer icon on towards the bottom-right of the screen and tap "3s".
- Take your photo equally normal.
- Head into the phone gallery.
- Tap the Live tag that sits in the meridian-left of the screen to bring upwards the Live Photos drop-down.
- Select Long exposure.
This uses the 1.5 seconds of prototype information captured both earlier and afterward you hit the shutter button to emulate the recording of motion you lot'd run into in a real long exposure – like auto light trails and soft-looking waterfalls. The timer is useful because it helps you steady the phone in the pre-shutter window of capture, particularly if you are not using a tripod.
Third-political party apps like Slow Shutter and Pro Camera by Moment permit you take things a lot farther, with emulated shutter speeds of up to 60 seconds. Or even longer if yous use the manual "seedling" way. You volition need a tripod for these and they aren't built to compensate for handshake movement. Nevertheless, the timed delay avoids the slight motion caused past the virtual shutter printing itself affecting the final image.
iv. Macro photography
A timer tin be useful for close-up macro photography because this style of shooting is highly sensitive to both handshake mistiness, and motion in the subject field. We tin can't count the number of times a scrap of air current has ruined a picture show of the veins in a leafage. For once, you'll be doubly glad the iPhone'southward timed manner uses outburst shooting.
The iPhone thirteen serial is the just iPhone generation that has a defended macro mode. In archetype Apple tree fashion, this switches on automatically when your field of study is exceptionally close. Information technology can be as trivial as 2cm from the subject. Yous merely demand to make sure information technology is enabled:
- Get to Settings.
- Select Camera.
- Turn on Automobile Macro.
If you accept another older iPhone, you can attempt macro fashion images but just won't be able to get as shut. Yous'll also want to lock focus earlier hitting the shutter button. Get close to the subject, and agree your finger on it until y'all see an AE/AF bulletin on-screen.
Even if you were actually likewise shut for the iPhone to focus properly, you can then pull dorsum until the picture appears precipitous. Then tap the shutter.
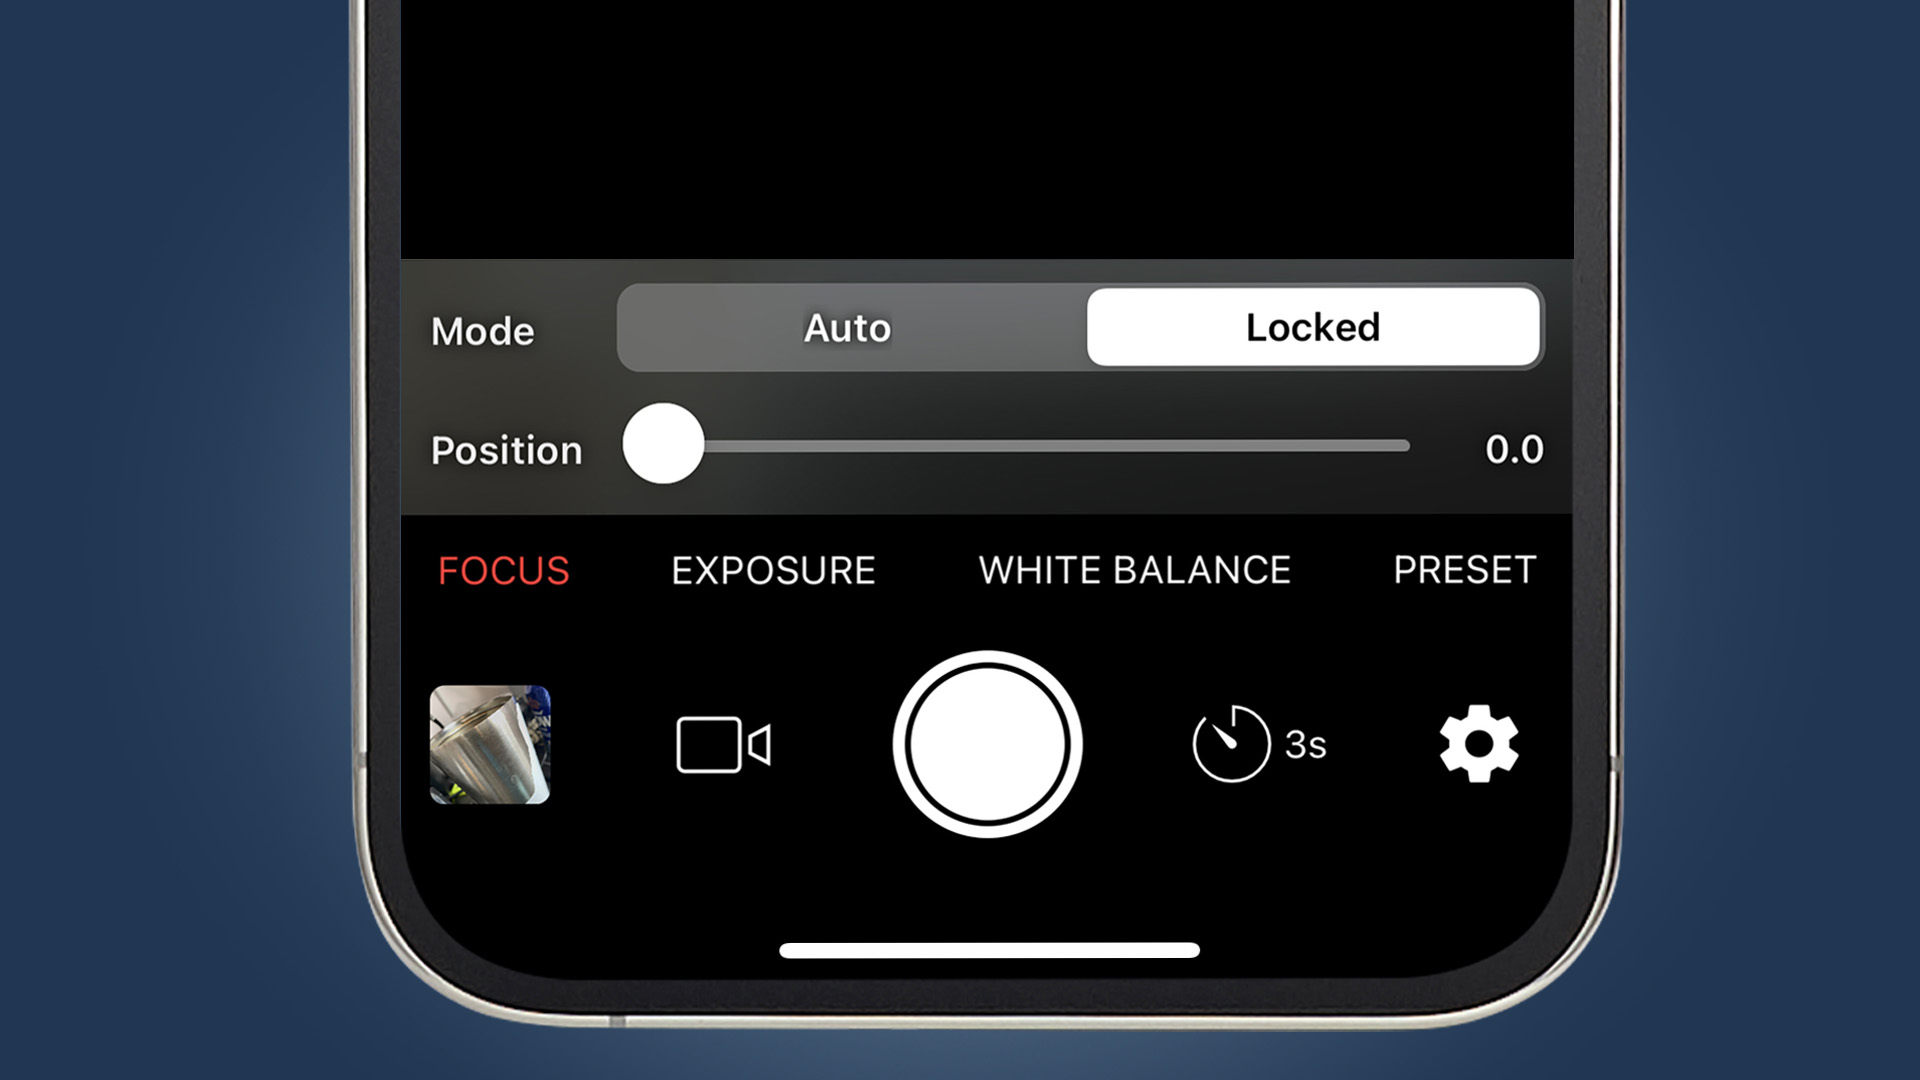
Alternatively, y'all might want to utilize a 3rd-party app that lets you manually concur focus to its nearest setting. We used Yamera for the job because, dissimilar many, its interface is not a full mess. Here'south how yous get it going:
- Open the Yamera app and select Focus in the series of settings past the shutter push button.
- Printing locked.
- Draw the focus slider back to its closest position become "0.0".
- Tap the timer dial right next to the shutter push button then it reads "3s".

Andrew is a freelance announcer and has been writing and editing for some of the U.k.'s top tech and lifestyle publications including TrustedReviews, Stuff, T3, TechRadar, Lifehacker and others.
Source: https://www.techradar.com/how-to/how-to-set-the-iphone-camera-timer
Posted by: merlinawayet1963.blogspot.com
0 Response to "How To Set Timer On Iphone Camera 13"
Post a Comment